
Too Many Requests from Your Network
Please complete verification to access this content.
Your blog speed is as important as any aspect of your blog. Nobody likes to visit a slow loading site, in fact, slow sites piss people off.
You need to give your blog loading time a special attention if you have not been doing so before because your blog speed affects your reader’s experience and it also has an impact on your blog search engine rankings.
Once you’ve launched a blog, you might want to speed it up; I have always been looking for ways to speed up my blog so that I can give my readers a better user experience whenever they are visiting my blog and I have tried various methods and tricks that promise to push up my loading speed and I can say that I have gotten a great deal of improvement.
There are various WordPress optimization tips and Plugins out there that could help you with improving your blog loading time, but most of them hardly work.
I know you may have activated a Cache plugin like “WP Super Cache” but the truth is caching plugins alone cannot perform all the speed boosting job, they have their limits and that is where other cool plugins like Autoptimize comes into play.
Autoptimize is a FREE WordPress plugin that will concatenate all scripts and styles, minifies and compresses them, adds expires headers, caches them, and moves styles to the page head, and scripts to the footer.
It also minifies the HTML code itself, making your page really lightweight.
Also, there are advanced options available to enable you to tailor Autoptimize to each and every site’s specific need.
I am using this plugin on every WordPress Blog and WP Powered Niche sites that I own and the result I am getting in terms of loading time is great!
Autoptimize does what it says it does and the best part is that it does it excellently without breaking a thing.
Autoptimize works relatively well with almost all themes and plugins, I have not had any complications with it since I have been using it.
How to Install Autoptimize Plugin
There are two ways by which you can install Autoptimize on your blog.
1 – Download the plugin from the WordPress repository and upload it via your blog admin area.
2 – Go to “Add New” plugins page from your blog dashboard, search for Autoptimize and install it from there.
Once you have installed it, you still need to go to the plugin settings page to activate all of its features.
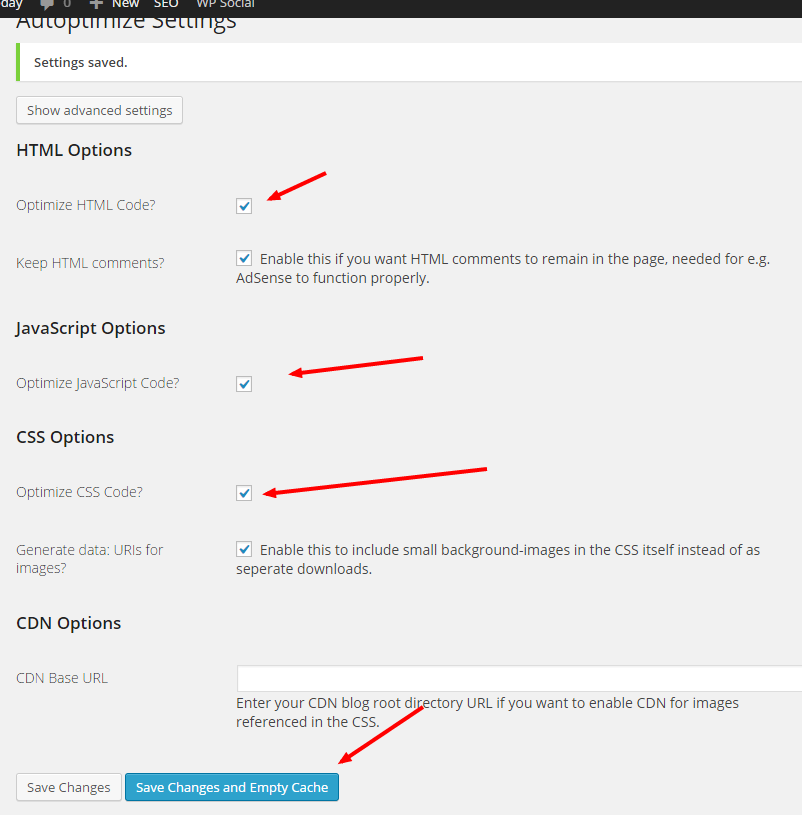
On the settings page, you will see a page similar to the image above, just tick all the boxes and save your settings.
Once the settings are save, you are set! Try to open your blog in a new tab to see the difference in the loading time.
I will also recommend you use Google PageSpeed Insights to check the speed after you have activated and configured Autoptimize plugin.
Note: You really should use a caching plugin such as e.g.WP Super Cache or HyperCache to complement Autoptimize.
You should try out Autoptimize today and give me a feedback on its performance. I will love to know if it has an impact on your blog speed.